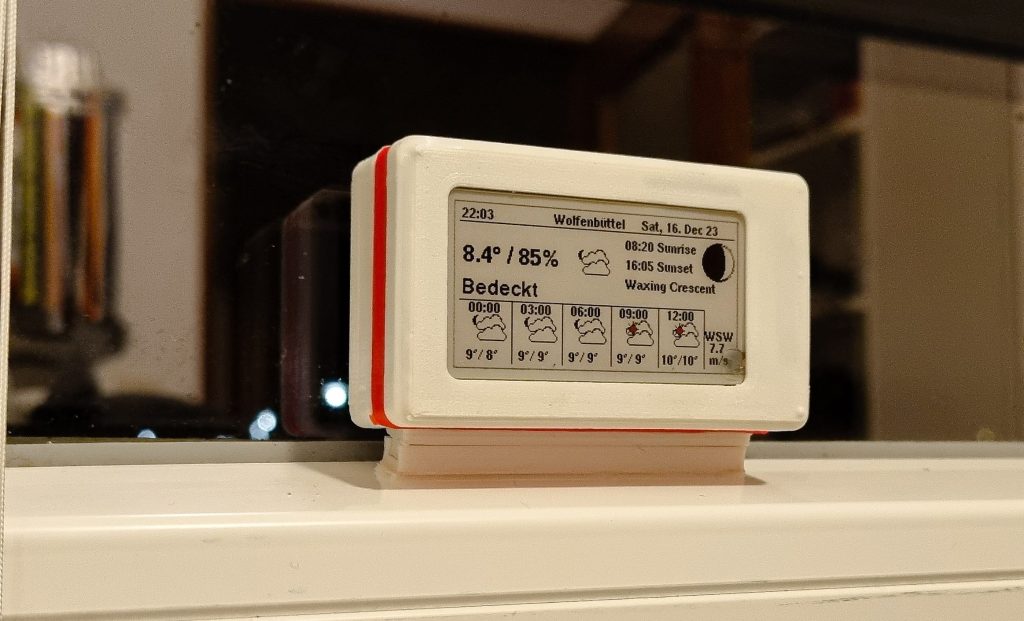
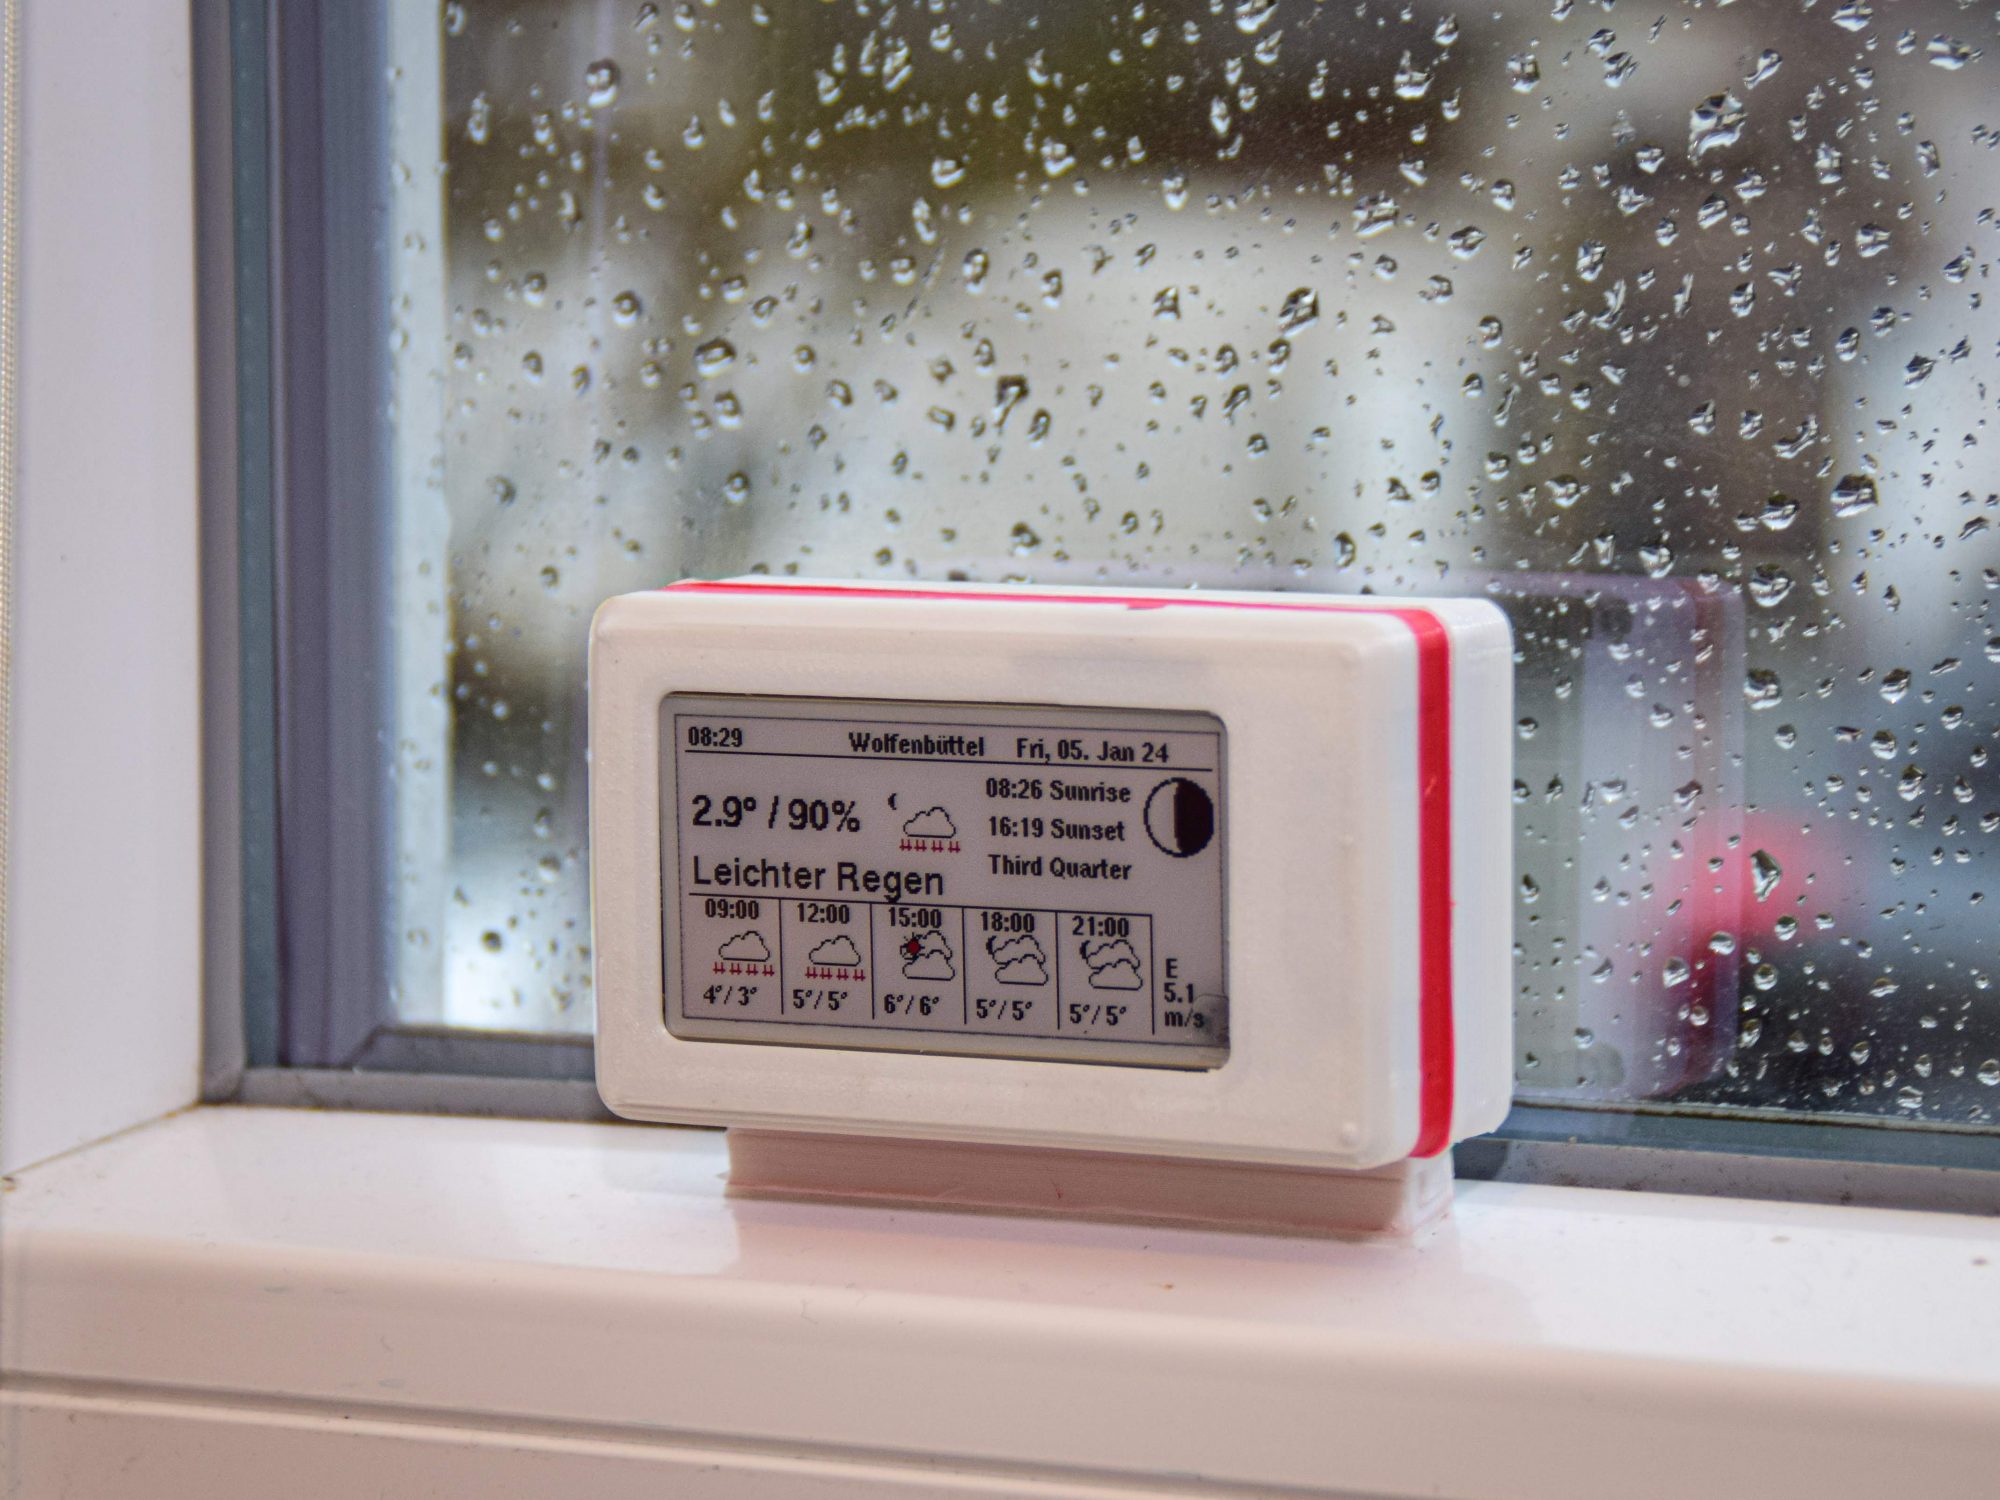
A new project is up and running! During the last couple of months, I have been working on a power-efficient and small form factor weather station. I designed it in a way that it can be placed on a window frame to get solar light during the day so its small LiPo can be recharged.
For this first project instance, only commercially available modules have been used to speed up the first proof of concept, the one I am describing in this post.
At the time of writing this post, the station has been sitting on my window for a week and has kept up delivering weather updates, despite the dark winter days that we are having in north Germany.
Contents
What´s inside?
Here below you can find some more details about the required components needed for this project.
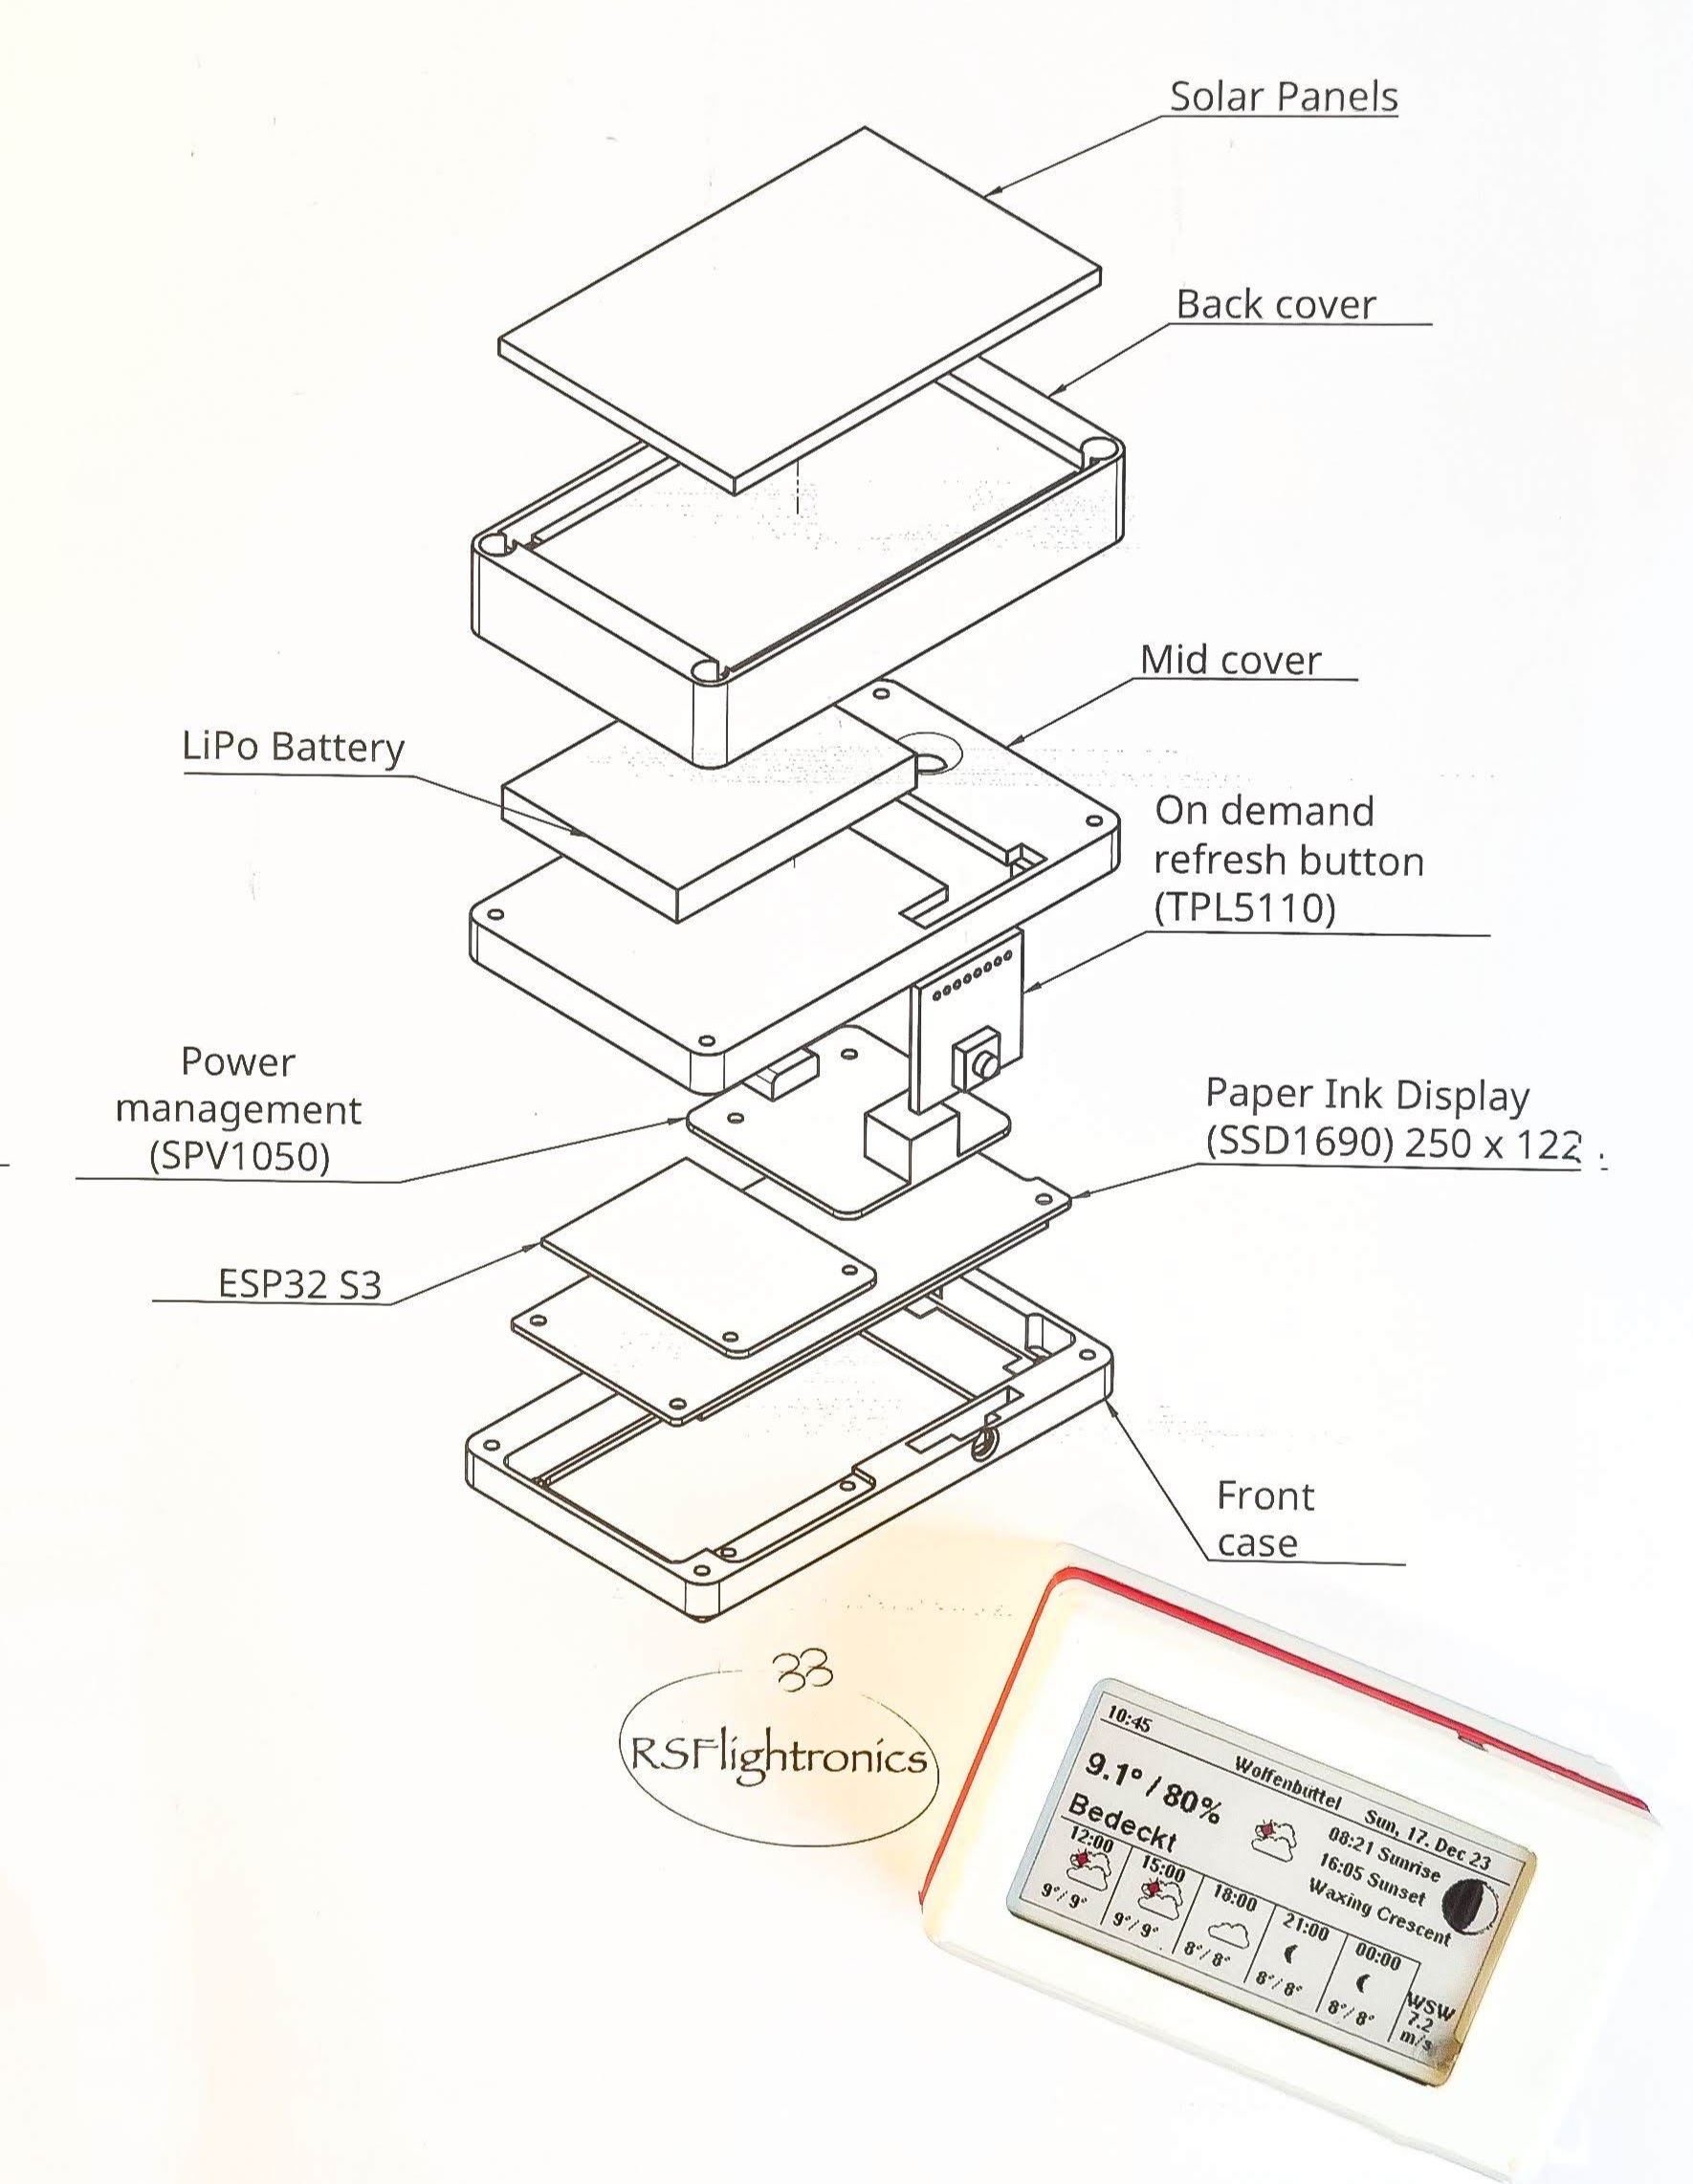

Concept

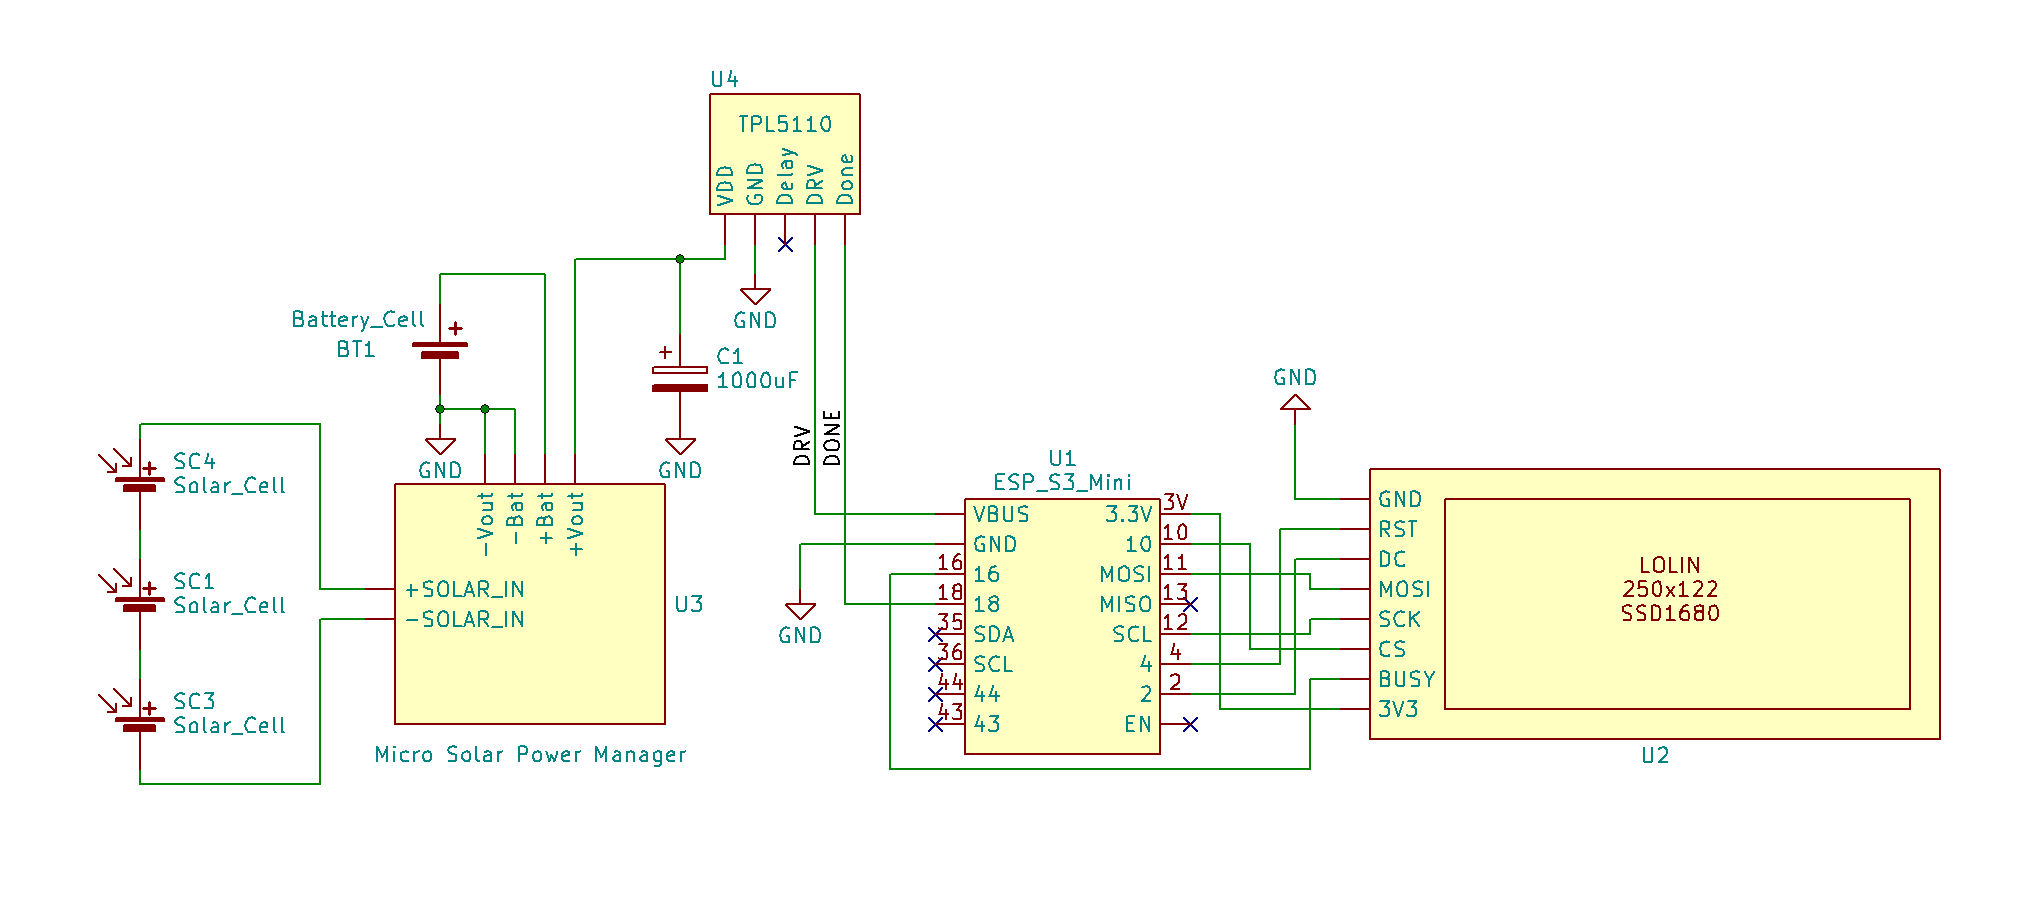
The concept chart above provides an overview of how the modules are interconnected. The solar cells provide energy to the energy harvesting module which will take care of loading the LiPo battery whenever the solar panels are generating energy. One of the particularities of this energy harvesting configuration is that it works even with very low input from the solar panel side ( as low as 0.5V). This makes it optimal for indoor energy harvesting.
Even though the ESP32 S3 has a good deep sleep characteristic, some uA are still required during this state. Since we are using a paper ink display, once it has been updated we don’t need to keep providing energy to it anymore until the next update is required. Keeping in mind that the current consumption needs to be kept at its lowest to prevent the battery from running out of juice, a better solution than just relying on the ESP32´s sleep is required. This is the point where the TPL5110 comes into play.
The TPL5110 module enables a “clean” cut of power, lowering the standby consumption to the order of nano amperes. The TPL5110 can be programmed to wake up at a regular period and once the work is done, the ESP will signal it with the “Done” signal so the TPL5110 goes back to sleep and cuts off the current.
To keep the current as low as possible when the ESP32 is enabled, some changes need to be made to the ESP32 S3 Mini module. The changes consist of removing the RGB LED that has a “high” quiescent current and changing the integrated voltage regulator to something that fits better the purpose that we are trying to achieve. These steps are described later in this post.
The setup described above has been running for months while mounted on a protoboard.

Part list
- 1x ESP32 S3 Mini
- 1x SPV1050 Micro Solar Power Manager
- 1 x TPL5110 module
- 1 x 3.7V 500mAh LiPo battery 403040
- 1 x TPS73733DCQR Low-Dropout Regulator
- 1 x 1000uF 10V electrolytic capacitor
- 3D printed chassis
- 2 x M2*4 Flat head self-tapping screws
- 4 x M2*20 Flat head self-tapping screws
Build Process
Adapting the ESP 32 S3 Mini module
Let us begin by removing both components marked in the picture below.

By removing the integrated RGB LED we are saving some precious mA and by upgrading the voltage regulator (next step) we are expanding our battery range by using a better regulator with a lower LDO.
Once both components have been removed, our board should look like in the following picture

Our next step will be to solder the new voltage regulator. For this step, I am using the TPS73733DCQR Low-Dropout Regulator . To integrate it into our module, a little surgery will be required. Here I am sharing what worked for me, but I am sure there might be a lot of more (and elegant) options 😉 .
The following pinout applies to the TPS73733DCQR:
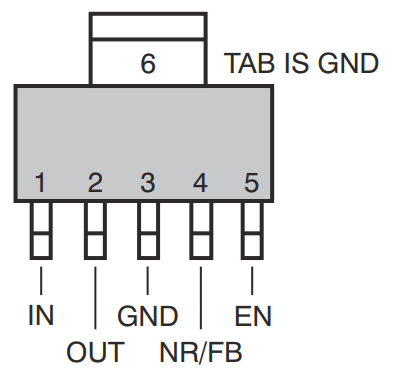
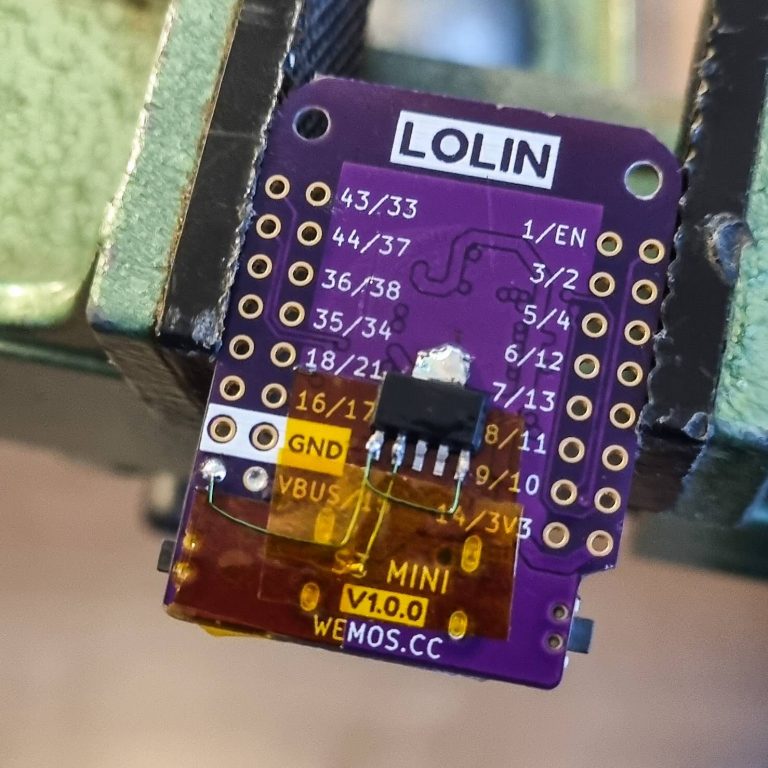
One important point to mention is that at the end, I replaced the VBUS and the +3V3 with a thicker wire.
Once this step has been done, we can proceed to interconnect the modules as shown in the following schematic:
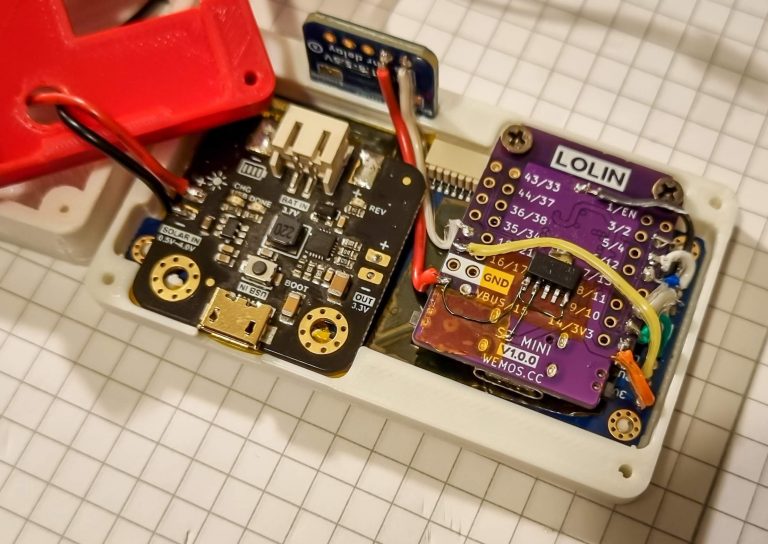
 For the cabling, it was helpful to have the chassis already printed so the cable lengths could be better estimated with all modules in place.


The ESP is a power-hungry component, mostly when it is trying to establish a WiFi connection. Once I mounted everything together I faced some issues with the TPL5110 not being able to keep the MOSFET switched on. After trying several fixes for this issue I ended up adding a 1000uF capacitor directly to the battery connector (see schematic). I tried with smaller values but 1000uF was the only one that provided a stable and reliable performance.
Software
I don’t take any credit for the software running on this project. The original source was written by David Bird and the code can be found on his GitHub repo.
An adapted version of the code for this project can be found under the following repository: Solar_E-Ink_Weather_Station
Make sure owm_credentials.h is properly configured so the weather information can be retrieved from www.openweathermap.org
Next steps
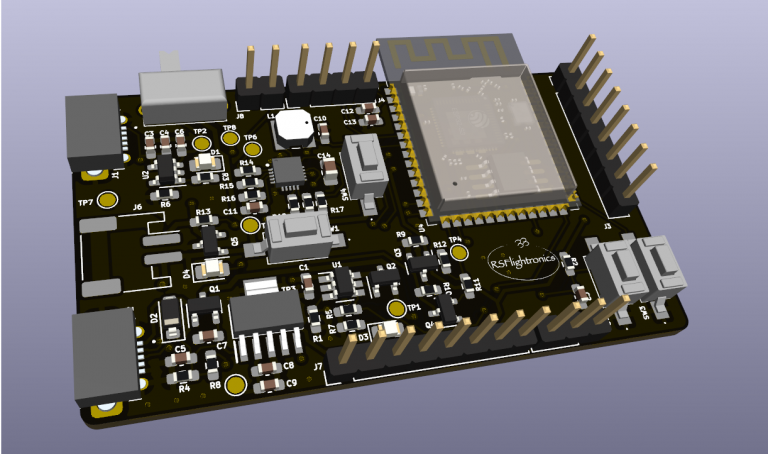
A dedicated PCB with an even more optimized power consumption and several additional features is almost ready. Here is a preview:

Cool, I would be interested in a pcb. might try to diy but new to electrionics and not sure my skills are adequate to do the voltage regulator switch
Hello John, is a fantastic project! I want one! When are the Version 2 to buy or get the instructions? Kind regards Alexander
Hi Alexander, the PCB is already designed but unfortunately, it will take a while until it is available. I will let you know once it is available 😉
Any update with the PCB ? Availability? Komplettbausatz?