
Jon Snow would agree with this fact: Winter is coming. Dear drone enthusiast, have you already made plans for next winter? Are you looking for an alternative for when weather is not good enough to go outside and fly? Have a look at this micro quad, great to fly indoor and to work on your pilot skills without caring about bad weather!
The Tiny Whoop has been around for a couple of months with very good reviews. After doing some research I decided to give it a try. My main motivation for building this micro quad was that were I live, the nice days to fly are just not enough for me.
Contents
Part list
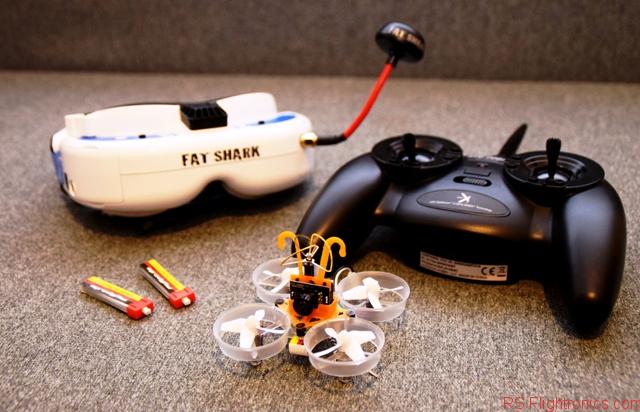
In order to create your Mini Whoop, you will need the following items:
- Blade Inductrix
- Ready to fly version (RTF) or ready to bind version (RTB)
- Lipo 205mAh 3,7V 25C/50C
- FX797T 5.8G 25mW 40CH AV Transmitter With 600TVL Camera
- 6x15mm motor (speed: fast)
- Blade Inductrix FPV Camera Mount
- Tiny Whoop (Inductrix) Antenna Guard
- Lade adapter 4-fach (parallel)
- Multiprotocol module for Taranis
- Case for Multiprotocol module
- FPV Googles

Total cost is around $150 considering all the items mentioned above with 4 batteries and the Blade Inductrix RTF version. I didn’t count the Orange module and the FPV googles.
The most expensive part is the Inductrix. I am considering a new project with a different platform to see if the final cost can be reduced.
Inductrix Blade
The size of this micro quad is just perfect to fly indoor. Its flight is very smooth and the PIDs and rates feel comfortable to fly in tight spaces. Another thing that called my attention is that it is very quiet. I am not sure if the ducted design has something to do with this.
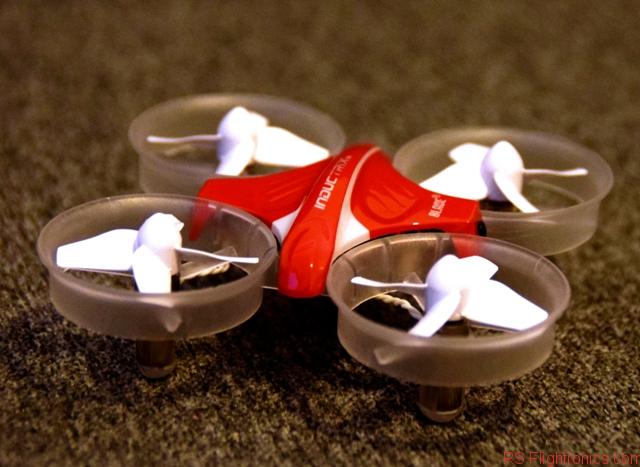
One of the nice features that the Blade Inductrix offers is that it can bind to a Spectrum control allowing a better experience. For those who have a Taranis, it is possible to get a module from HK in order to be capable of binding with the Blade Inductrix. I have been waiting for weeks to have this module, but it looks like it is going to be a while until HK restocks it. That is why I decided to go ahead with the RTF version. This version includes also the transmitter.
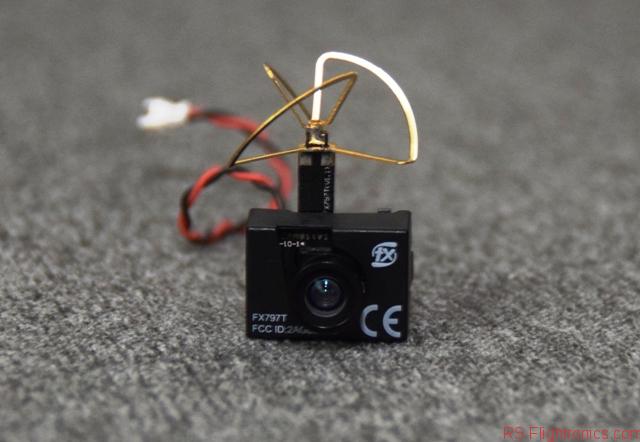
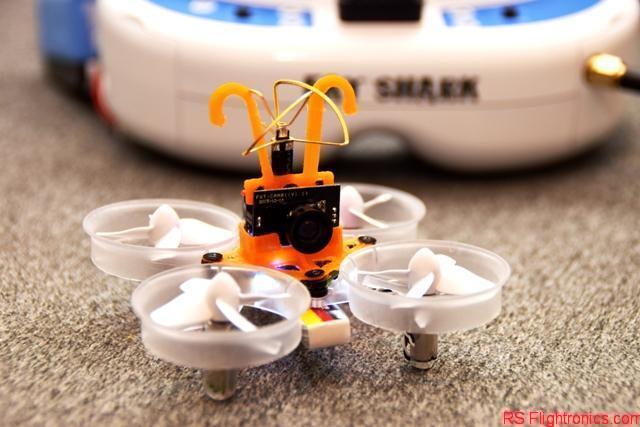
FPV Camera
The FX797T camera is small enough to fit on your Inductrix without adding excessive weight to the future Tiny Whoop.


I was skeptical about the performance of this tiny camera since it is only rated with 25mW. The first time I saw the image quality I couldnt belive how good it was! I am very happy with this little camera. It works just great.


Motor update
Since a camera and a bigger battery is going to be added to the original Inductrix, updating the motors is reasonable choice. I just followed the default recommendations and ordered some motors from Micro Motors Warehouse.
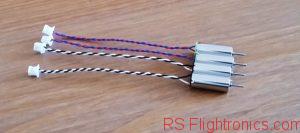
The good thing about this update is that the motors come with the connectors. The replacement is pretty fast and with no complications!
Camera Mount and Antenna Guard
These two items are optional. They will help you to have a robust setup and also to protect the camera and its antenna.

If you can get the pieces printed I would advise to use them. The final setup looks better and a better protection is provided to the camera.
Putting the pieces together
The process of converting your Blade Inductrix into a Tiny Whoop is pretty easy. The following steps are a guide for the most relevant steps.
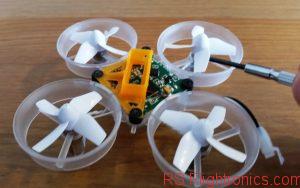
Step 1: Remove the propellers
After replacing the motors make sure that you mount them in the same place again! A screwdriver can be helpful to remove the propellers.
Step 2: Remove the motors and cable holders


Step 3: Prepare the new motors
In order to minimize interference coming from the motors, it is recommendable to twist the motor cables. The motors usually come without twisted cables.


Step 4: Mount the motors and the cable holders back in place


Step 5: Prepare the camera
In order to save some additional grams, remove the case.

Step 6: Mount the camera and solder the power supply

Step 7: Go and fly!
Tiny Whoop – First flight impressions
I am impressed with the responsiveness of such small quad. This is the first time for me flying FPV with brushed motors. I actually expected a little bit less of power but updating the motors and going with a bigger battery was the right choice.
The flight time is around 2,5 minutes. It is lower as expected but each second is worth! You might want to buy a bunch of batteries and a good charger so you have enough batteries available.
This is great setup for beginners to have a first experience in the FPV world and also for experienced pilots looking for something new and weather proof 😉
Tiny Whoop flight video
Please subscribe and keep tuned for further updates! Your comments and questions are always welcome!
