
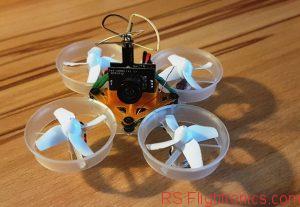
It has been a while since I fly with a the same Tiny Whoop setup as I described in one of my previos articles (Tiny Whoop – Build Log and Review). After flying lot of batteries I had the chance to make some impressions and to look for some Tiny Whoop upgrades. The following points were the most important to see how they could be improved:
- Flight time
- I would like as close as possible to 4 minutes!
- Radio Range
- I would like to avoid unplaned landings because the RC signal was too weak!
- Transmiter
- It would be great to use a good RC transmitter!
Contents
Improving the flight time
There is nothing more frustating than a short flight time or even worst, our setup falling down from the sky because the battery didnt last a expected.
Looking for further information, I learnt that the stock connector provided with the Inductrix is actually not adequate to cope with the amount of current that is supposed to be transferred from the battery to the motors. On the other hand, when the connector is not capable of matching the characteristics for a clean energy transfer, it will create a sort of bottle neck having as main consequence an early triggering of the Inductrix low voltage cutoff (LVC). This can be seen as a resistor connected between the batterry and the board, making the effective voltage to drop down. From this fact you can absolutelly expect a shorter flight time.
Oh! did I already mention that this effect get worse after using several times the battery? The problem is that there is also a mechanical wear that with the usage and time will amplify this previous described mismatch.
What to do in order to increase and ensure longer flight times?
I have seen several posts where it is recommended to bridge the LVC as a magical solution for this issue. The problem is that after applying such a “solution” you will have to relay on timers (if you happen to be using a decent RC transmitter) or you can also fly until the battery is no able to make your quad hoover. I am not against this, but if there is a solution, I would like to go for one that will make my batteries last longer!
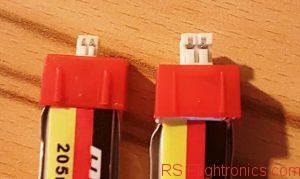
What finally worked for me was upgrading the stock pigtail with a better one, that means a better cable section and with a connector that actually suits the usage of a Tiny Whoop for FPVing.
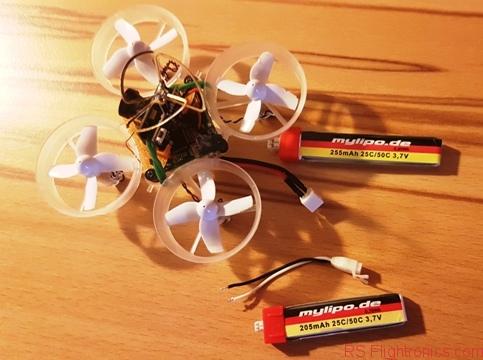
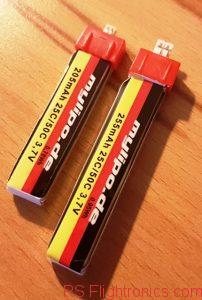
On the other hand, upgrading the batteries with a matching connector for the new pigtail did finish with the bottleneck issue. For this I used the new batteries from mylipo.de (255mah 25c/50c).
Now my flightimes get usually close to 4 minutes and I am no longer frustated with short flight time experiences! 🙂
All in all, these are the items that worked for me to improve the flight time:
Imroving the RC Range
When flying indoors and visiting all possible rooms with open doors, having a good RC range is not a minor point. So far I have been flying with the stock RC transmitter which is actually great, but when it comes about range, then I have only had issues. On the other hand, I have also noticed that the controll resolution ist not as accurate as I would have expected.
How to improve the RC Range
There are two steps to get closser to a better range.
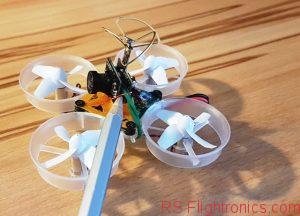
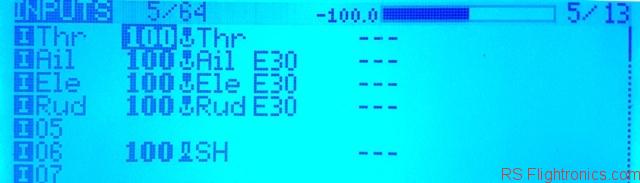
1)Tiny Whoop receiver antenna
Make sure that the antena on the Tiny Whoop is not left under the FPV module. This sounds silly but I have seen a good improvement on range after setting the antenna as shown in the following picture:
2)Avoid using toy transmitter!
Using a good transmitter will also help to cope with range issues. It is possible to bind your Tiny Whoop with your Frsky transmitter, by using an external multiprotocol module. In my case, I am using the module described in my previous article 2.4Ghz CC2500 A7105 Multiprotocol TX Module.

In order to get this module working properly for your Tiny Whoop setup, you need to follow the setup steps from here: 2.4Ghz CC2500 A7105 Multiprotocol TX Module. Then, you will need to follow these steps:


Final thoughts
After having applied this little changes to my Tiny Whoop I am very happy with the obtained results. I wish I have done this improvements earlier in order save some money! I hope that these tips also work for you! Let us know in case you have any question!


